QUICK GUIDE
Before starting this step-by-step guide, here is a quick explanation of two terms you will see:
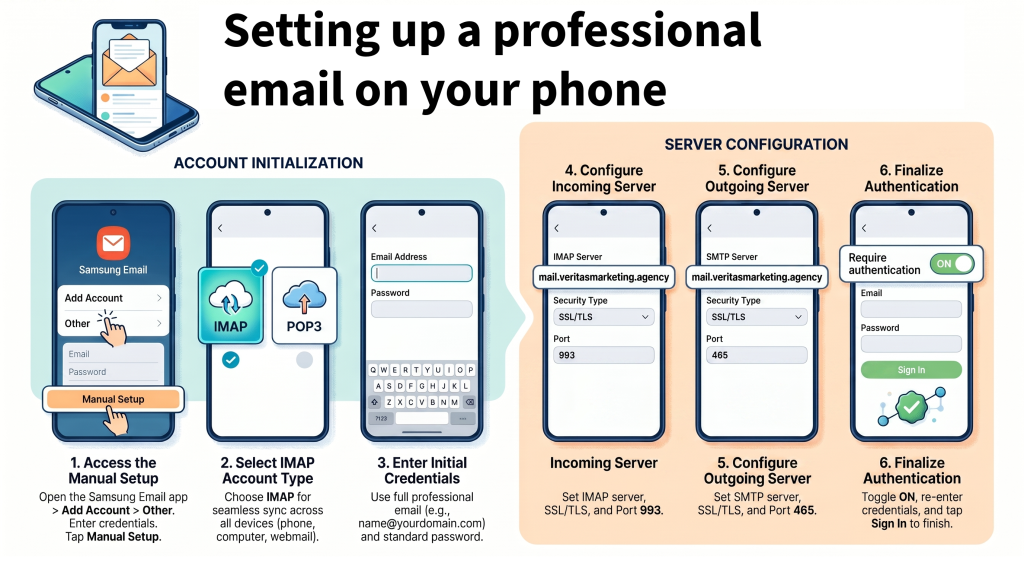
- IMAP (Recommended): This keeps your emails synced perfectly across your phone, computer, and webmail. If you delete an email on your phone, it disappears from your computer too.
- POP3: This downloads emails directly to your device and doesn’t sync changes back to the server. It is rarely used today.
This guide will show you how to setup your email on 3 different phone types and also on the Outlook app. You can quickly navigate to the one you want by clicking the name below. Should you still have difficulty after following these instructions then please contact me using the ticket support service.
Outlook App (Download from your chosen app store provider)
iPhone (Apple Mail App)
1. Open Settings
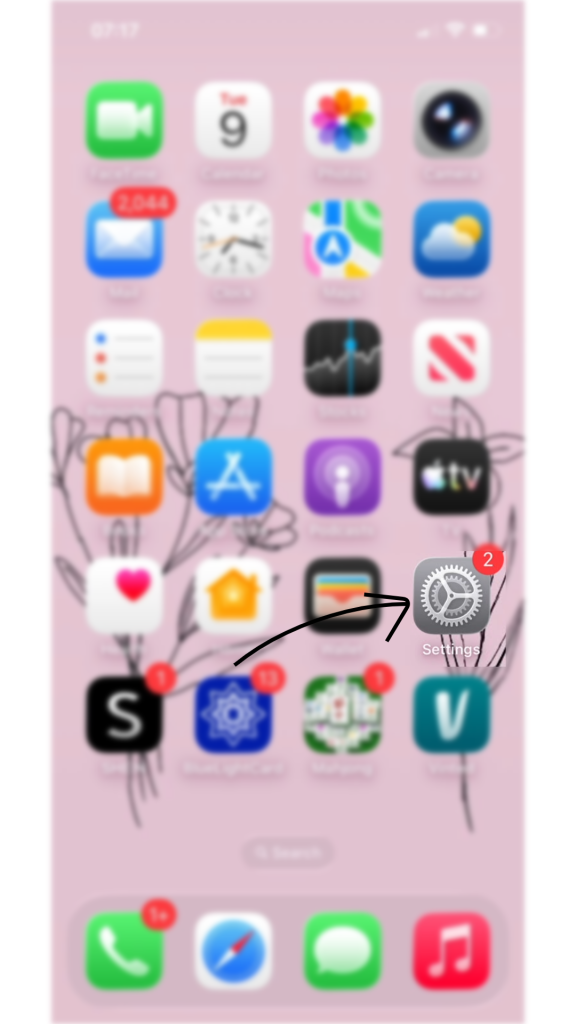
Go to your iPhone’s home screen and tap the grey gear icon to open Settings.
2. Navigate to Mail Accounts
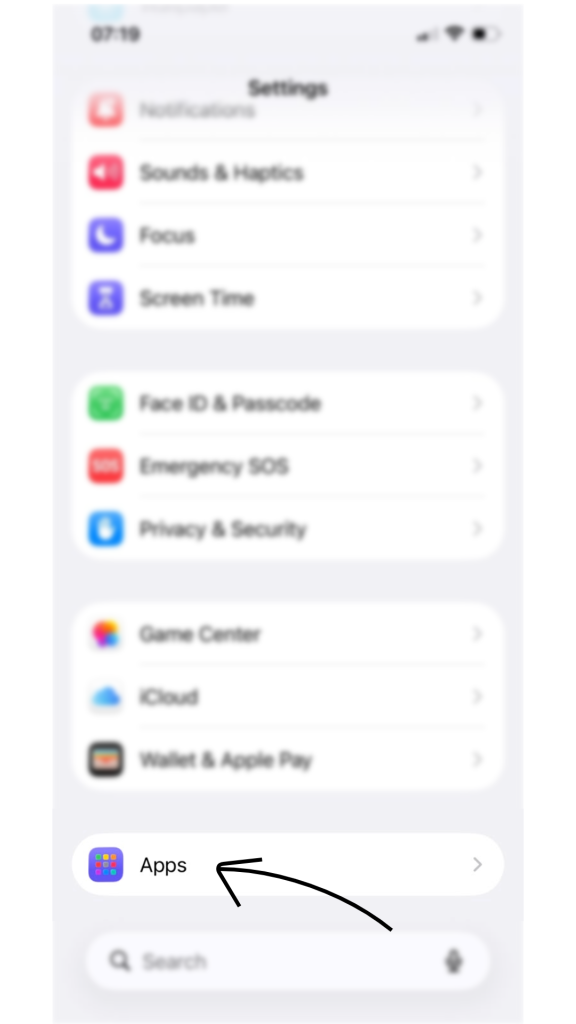
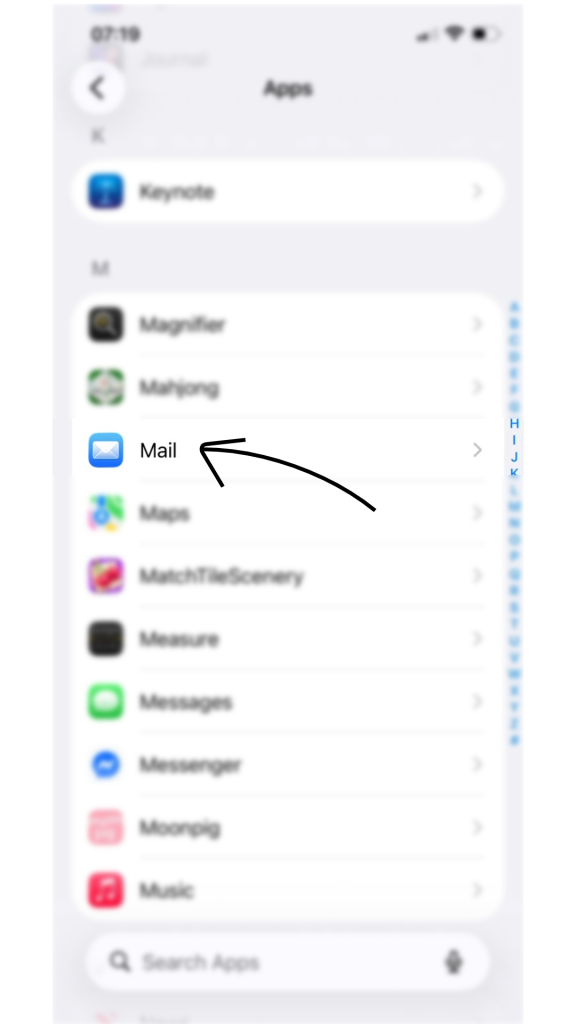
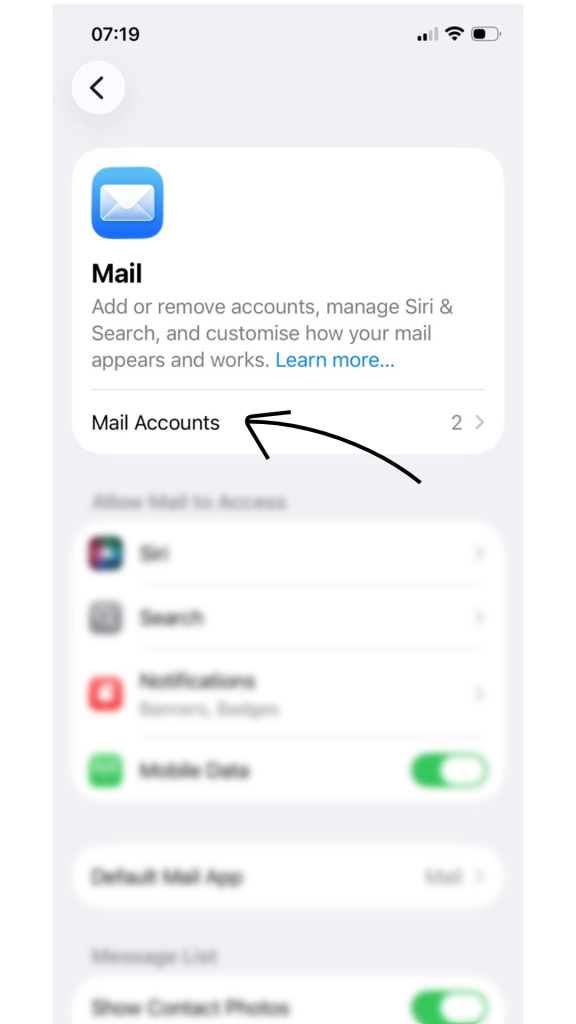
Scroll down the Settings menu until you find “Apps”, tap it, then scroll down to “Mail”, tap it, then tap “Mail Accounts”.
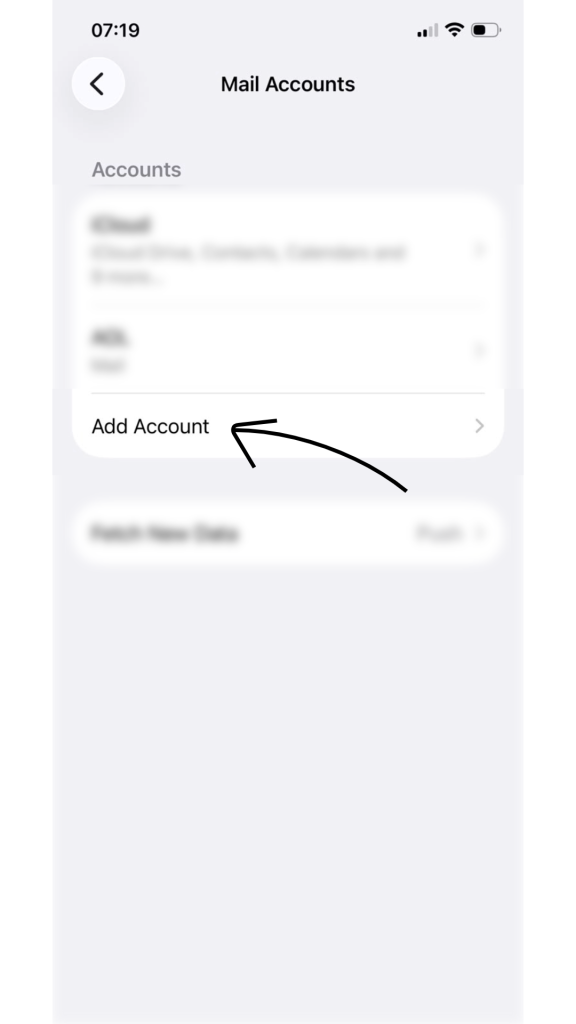
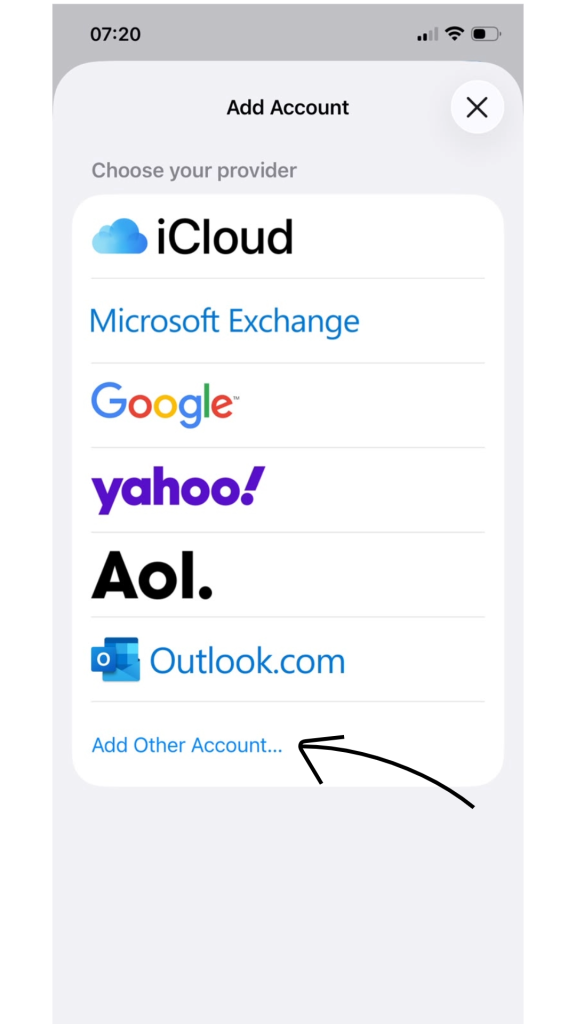
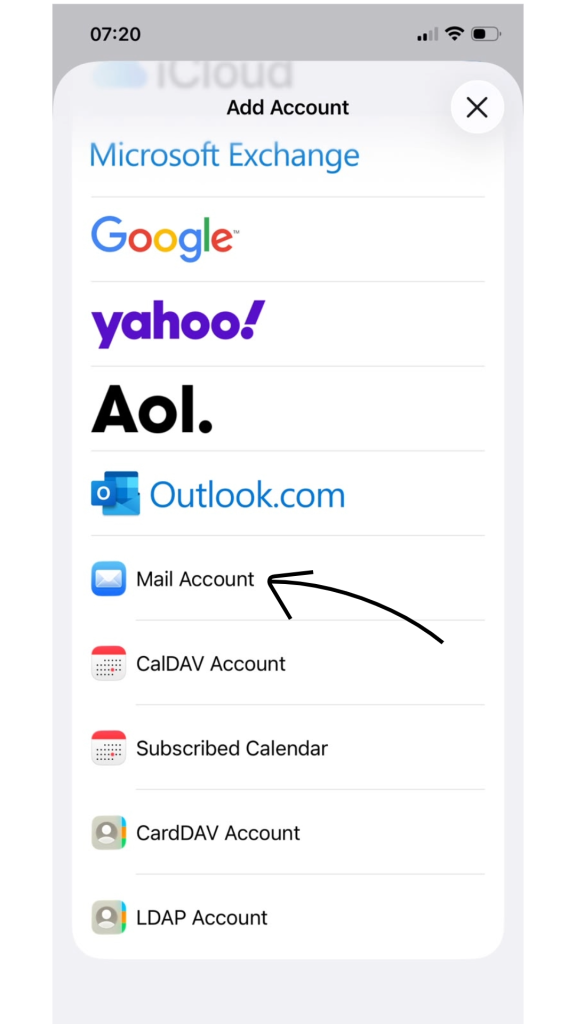
3. Start Adding the Account
Tap “Add Account”, and then tap “Add Other Account”. Extra options will now show. Tap “Mail Account”.
4. Enter Basic Details
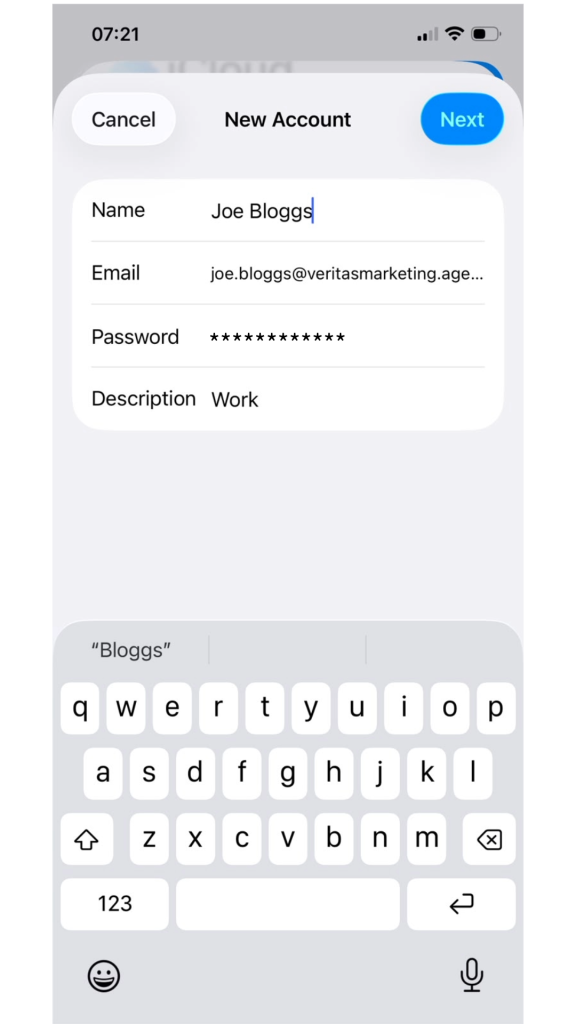
Use your full email address as the username
Fill in the form on your screen: Name: Type your name as you want it to appear when people receive your emails. Email: Type your full professional email (e.g., joe.bloggs@yourdomain.com). Password: Use the email account’s password. Description: Type a short name for yourself, like “Work Email.” Tap Next in the top right corner.
5. Configure Incoming & Outgoing Server
Ensure IMAP is highlighted at the top
Under the Incoming Mail Server section, fill in the following exactly: Host Name: mail.veritasmarketing.agency Username: Type your full email address again. Password: Use the email account’s password.
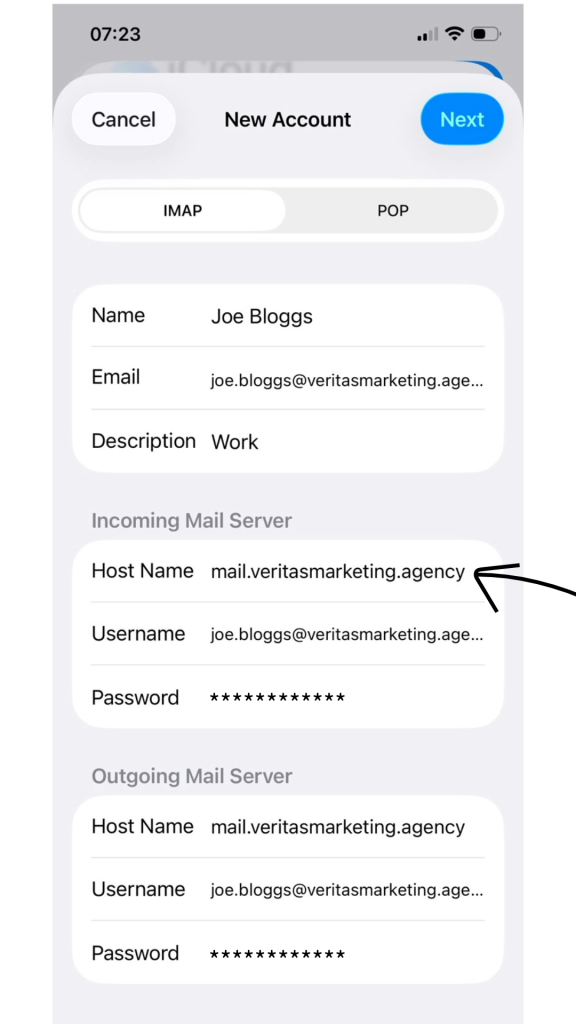
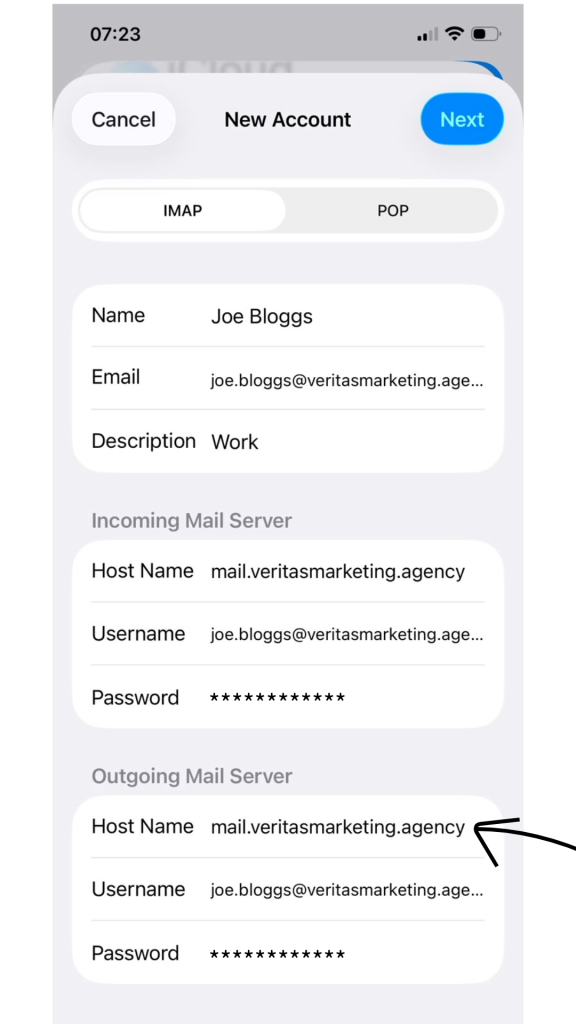
Apple says the outgoing servers are optional, but they are required
Scroll down to the Outgoing Mail Server section and enter the exact same details: Host Name: mail.veritasmarketing.agency Username: Type your full email address. Password: Use the email account’s password. Tap Next and wait for the phone to verify your details.
6. Save and Verify Ports
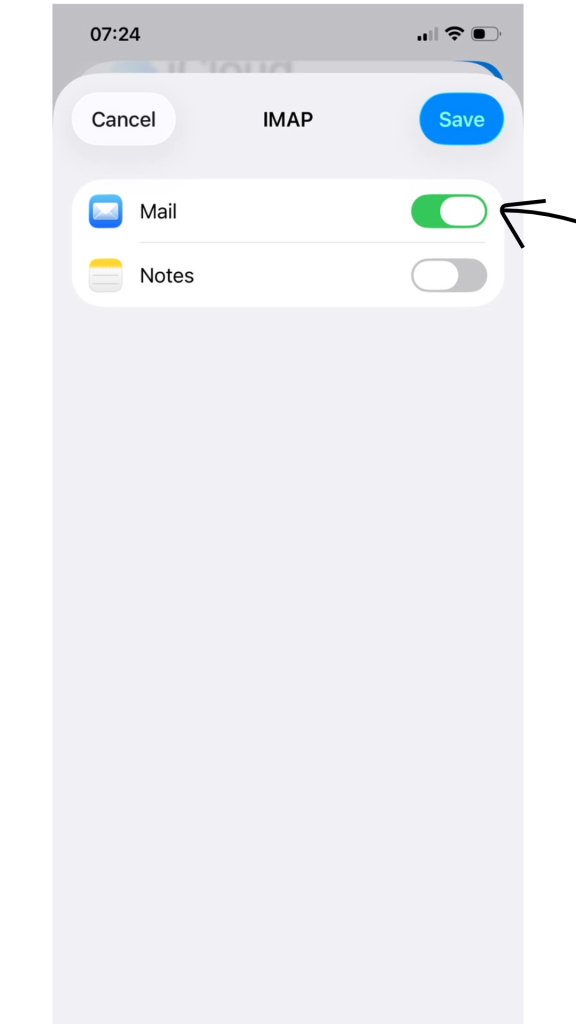
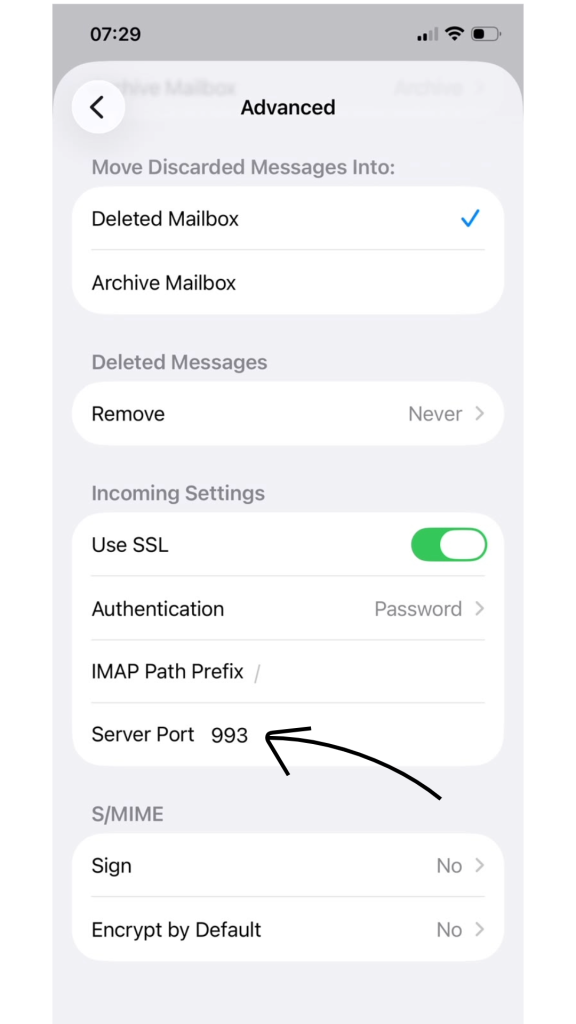
Once verified, ensure the Mail toggle is green and tap Save. To ensure your phone has chosen the right connection ports: Tap on your newly created account, tap the account name, and tap ‘Advanced’ at the bottom. Check that Server Port is 993 (or 995 if you chose POP3) and “Use SSL” is green.
7. Check it’s Working
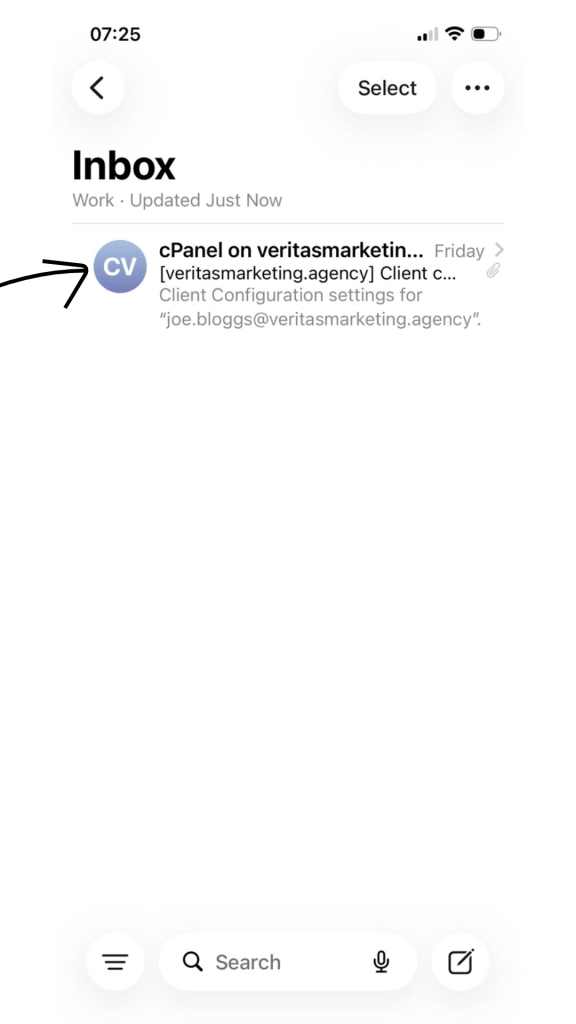
If all is correct, then your emails will download to your app.
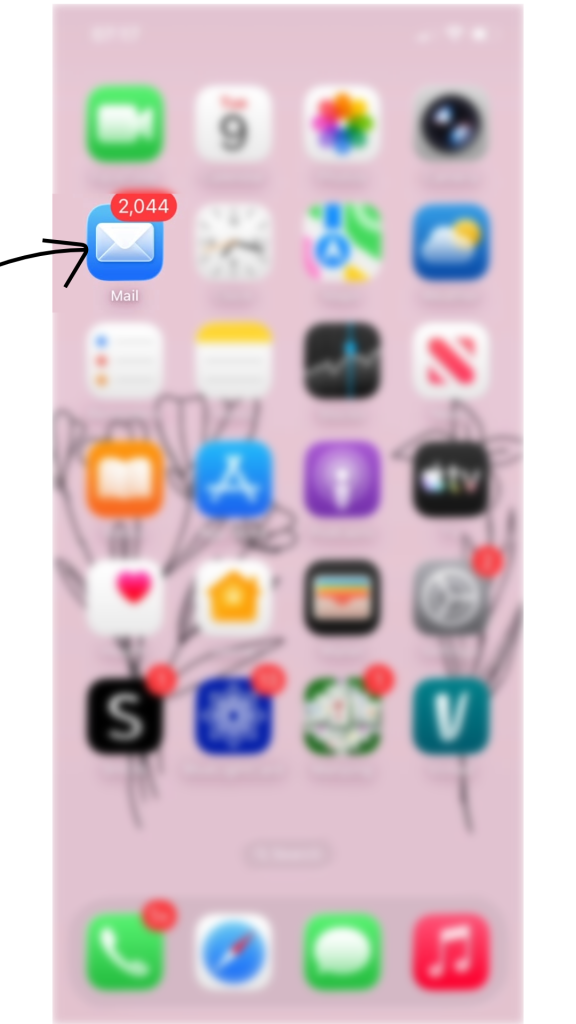
Android – Pixel (Gmail App)
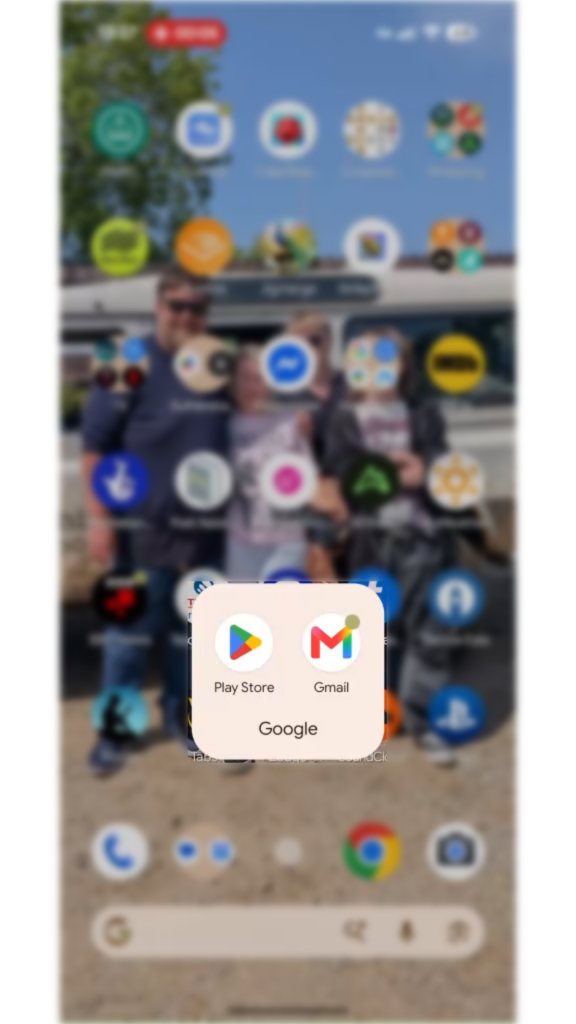
1. Open the Gmail App
Locate the Gmail app on your phone and open it.
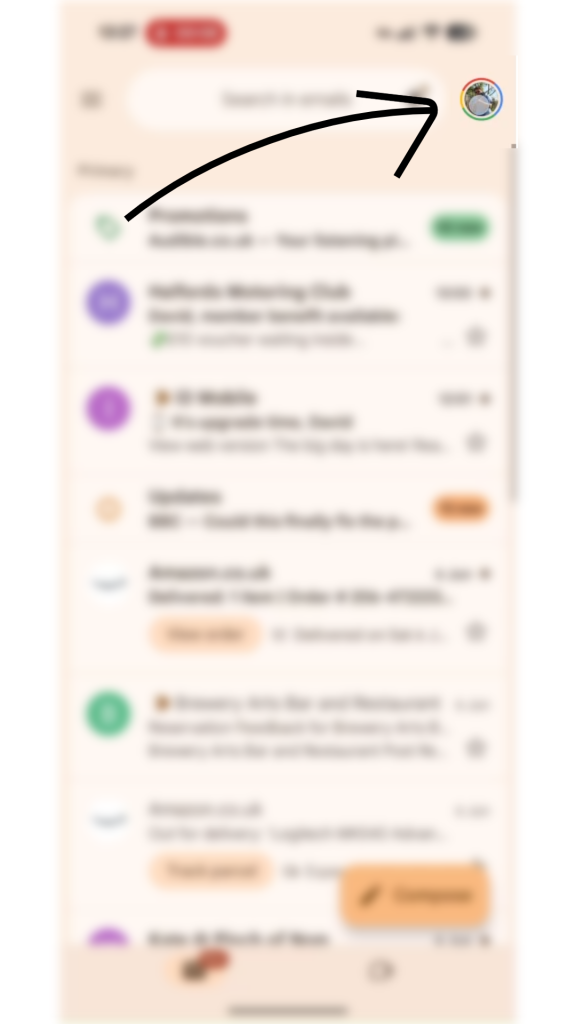
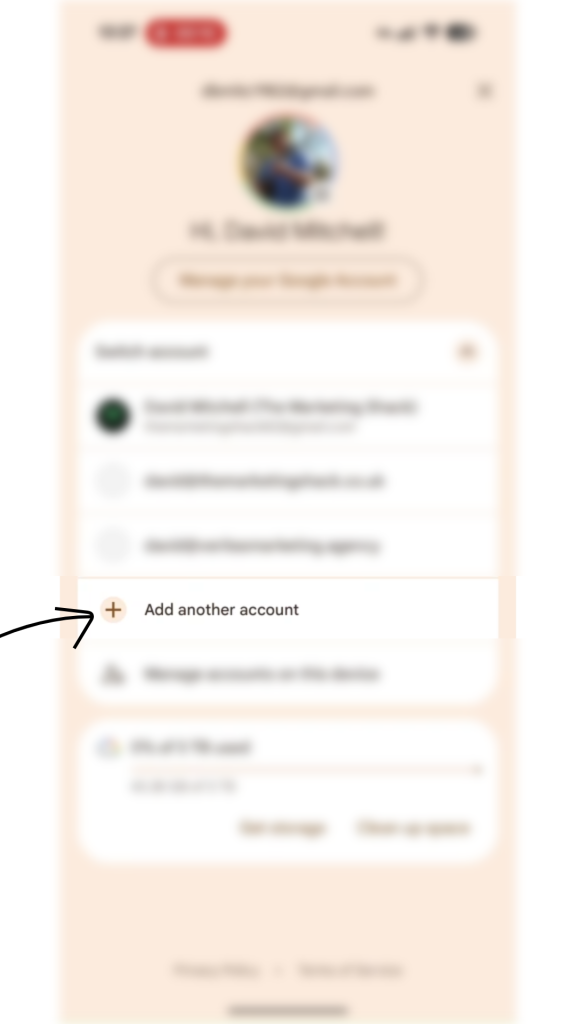
2. Access the Account Menu
Tap your circular profile picture or initial in the top right corner of the screen.
3. Start Adding the Account
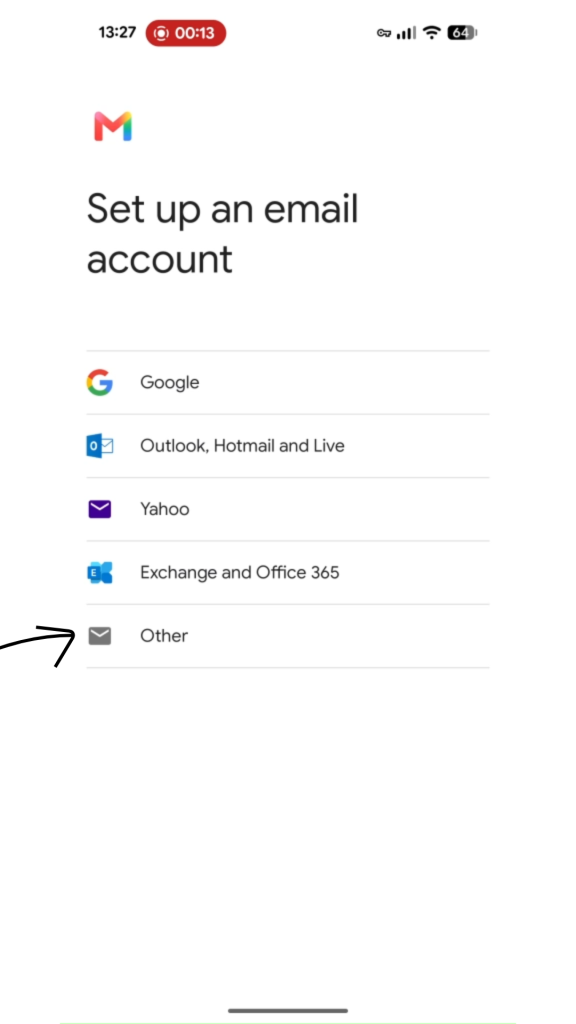
Tap Add another account, and then choose Other from the list of email providers.
4. Enter Email and Choose Setup Type
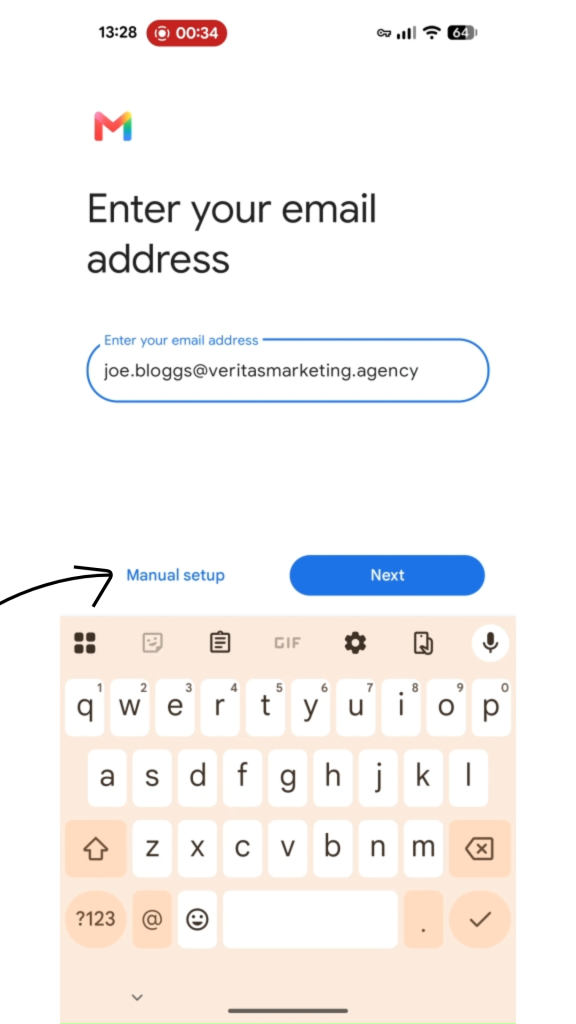
Do not tap Next immediately
Type in your full professional email address (e.g., joe.bloggs@yourdomain.com). Instead of tapping Next, tap Manual Setup at the bottom left.
5. Choose Account Type
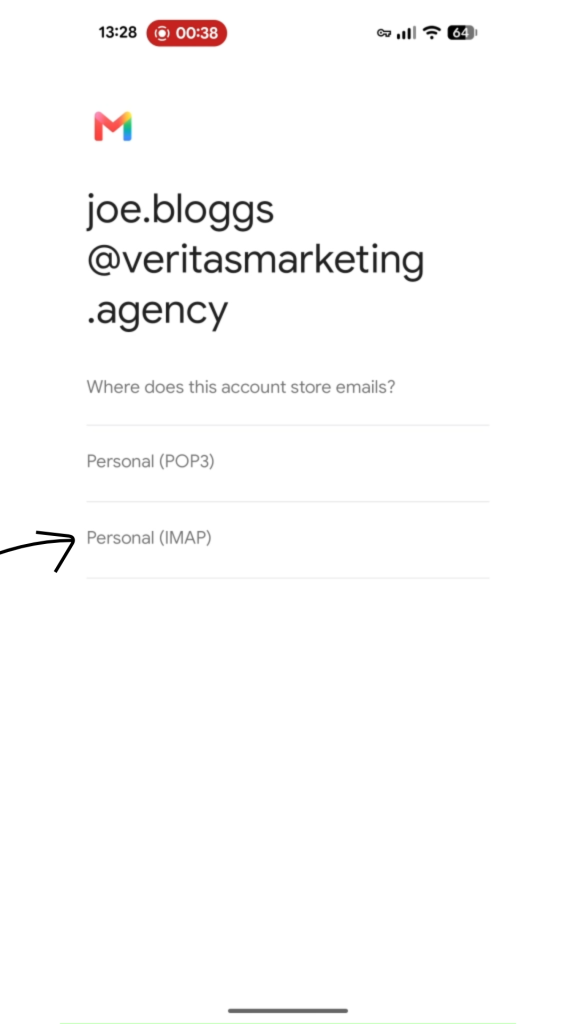
Select Personal (IMAP) from the list of options to ensure your emails sync properly.
6. Enter Password
Type in the email account’s password and tap Next.
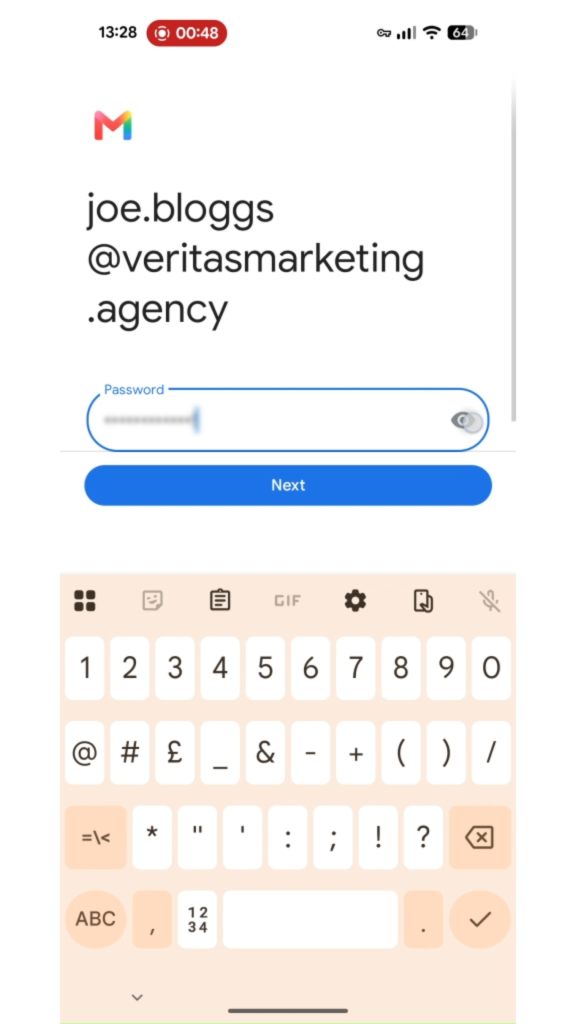
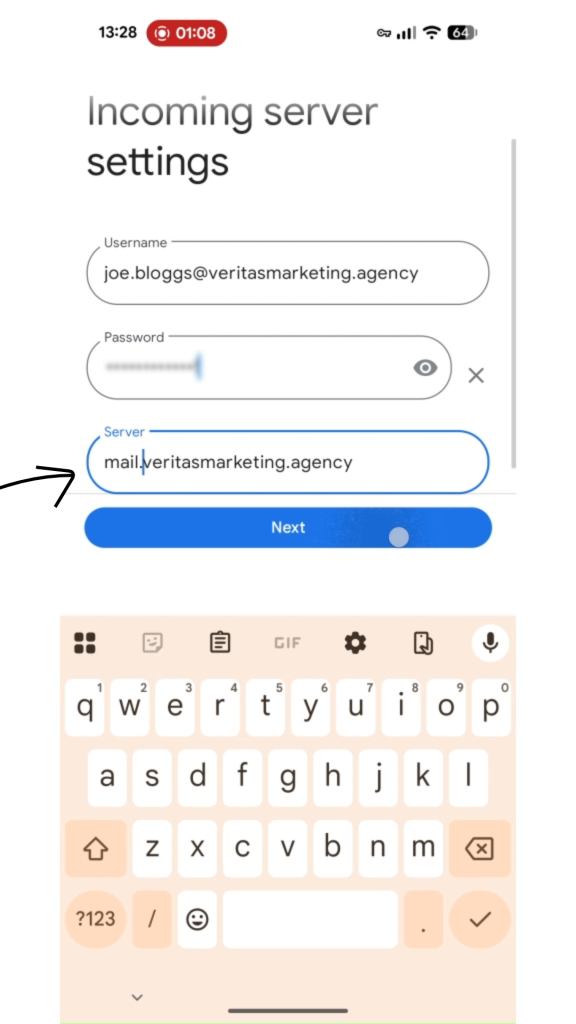
7. Configure Incoming Server Settings
On the Incoming server settings screen, verify your email and password are correct, then update the Server to: mail.veritasmarketing.agency
Tap Next.
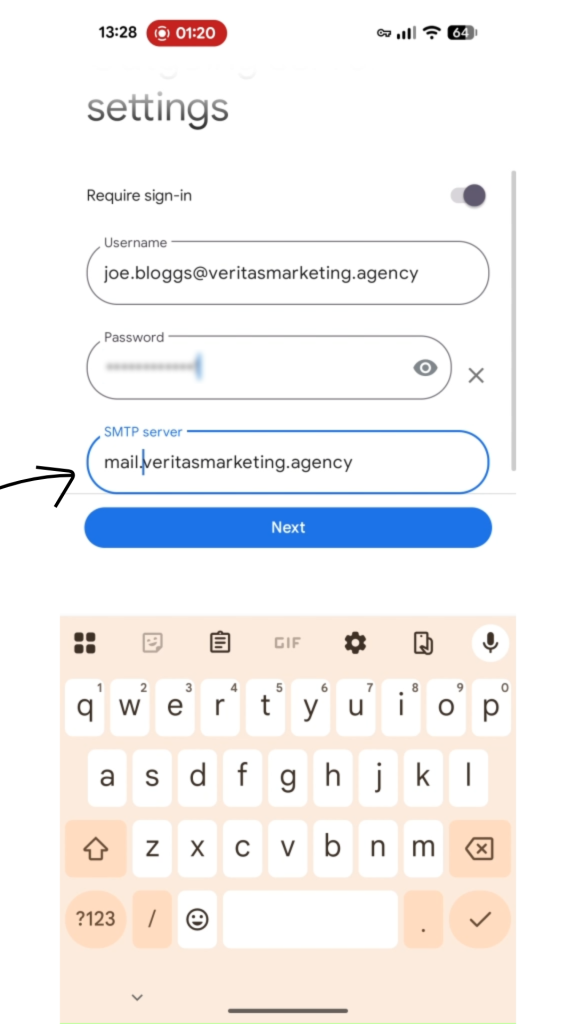
8. Configure Outgoing Server Settings
On the Outgoing server settings screen, verify your email and password, then update the SMTP Server: mail.veritasmarketing.agency
Tap Next.
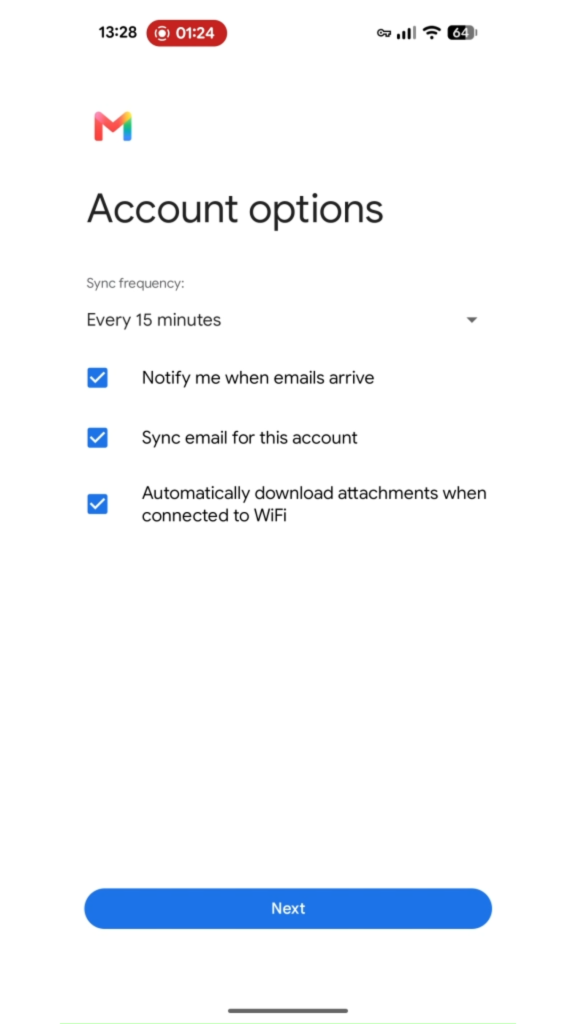
9. Finalise Setup
Choose how often you want the app to check for new emails and tap Next. Finally, type your name exactly as you want it to appear to people you email, and tap Next to finish.
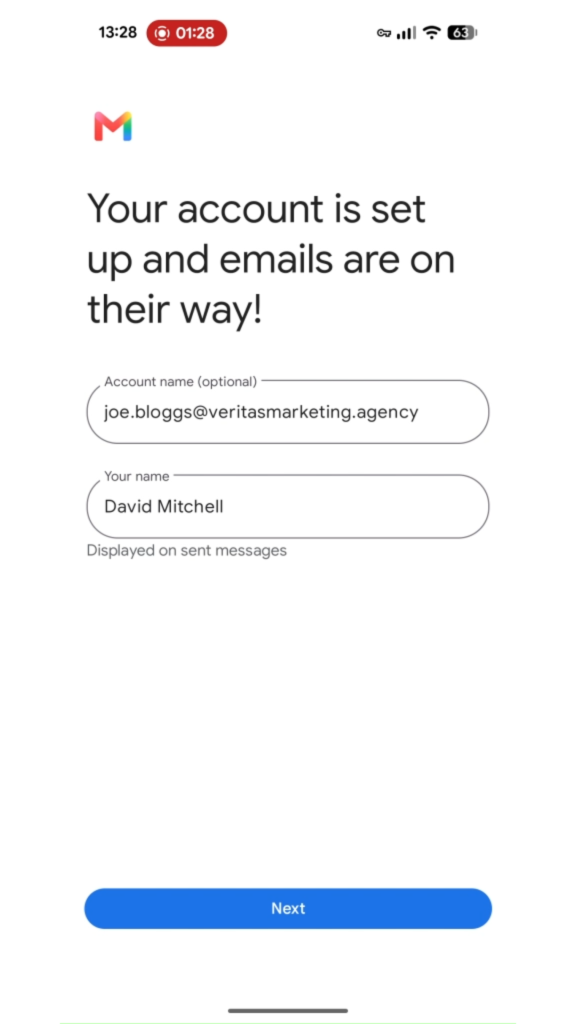
10. Check it’s Working
If all is correct, then your emails will download to your app.
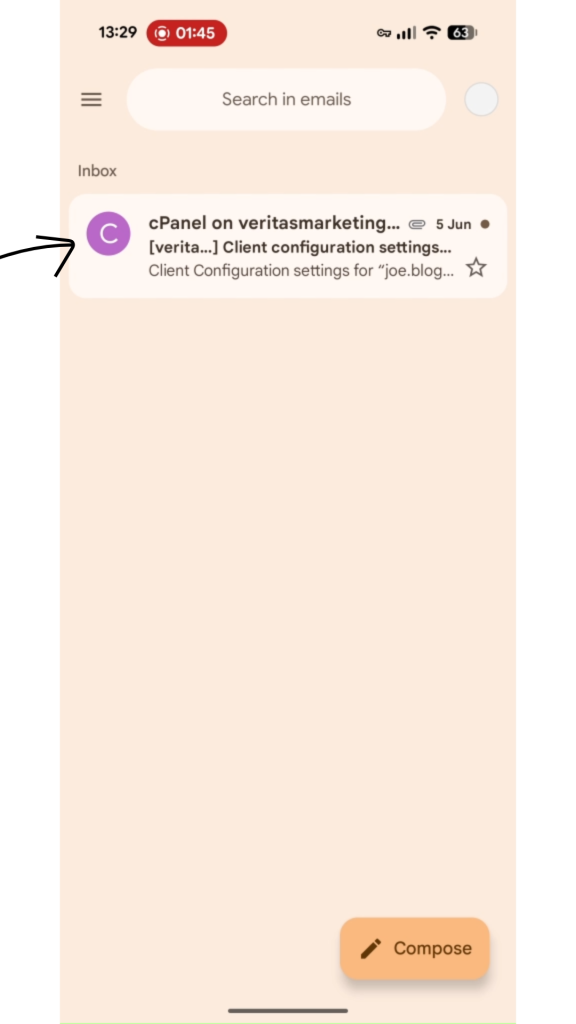
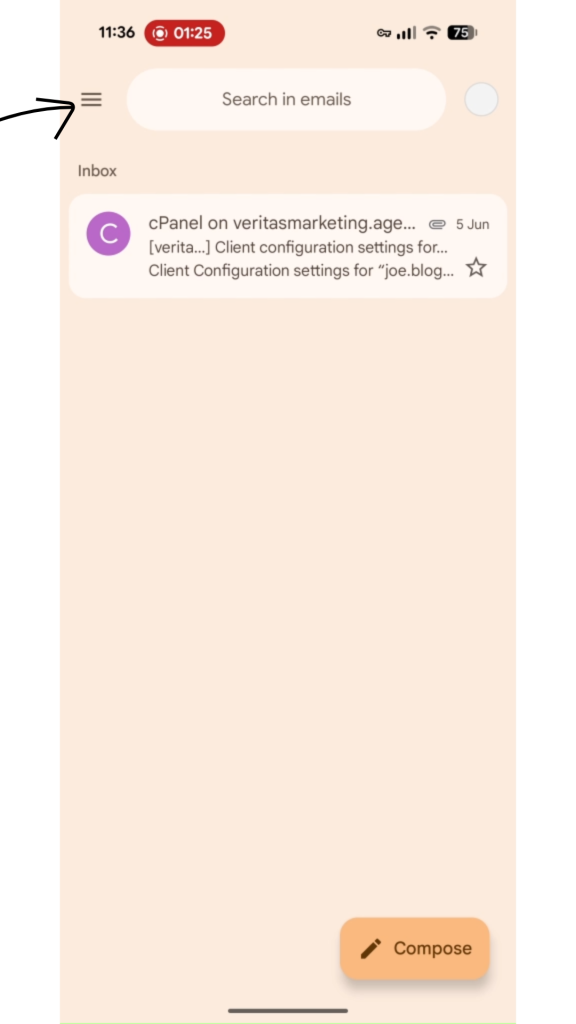
11. Troubleshooting
If it’s not worked then check the settings. Click the Hamburger Menu (the 3 lines at the top left of the app), and select settings.
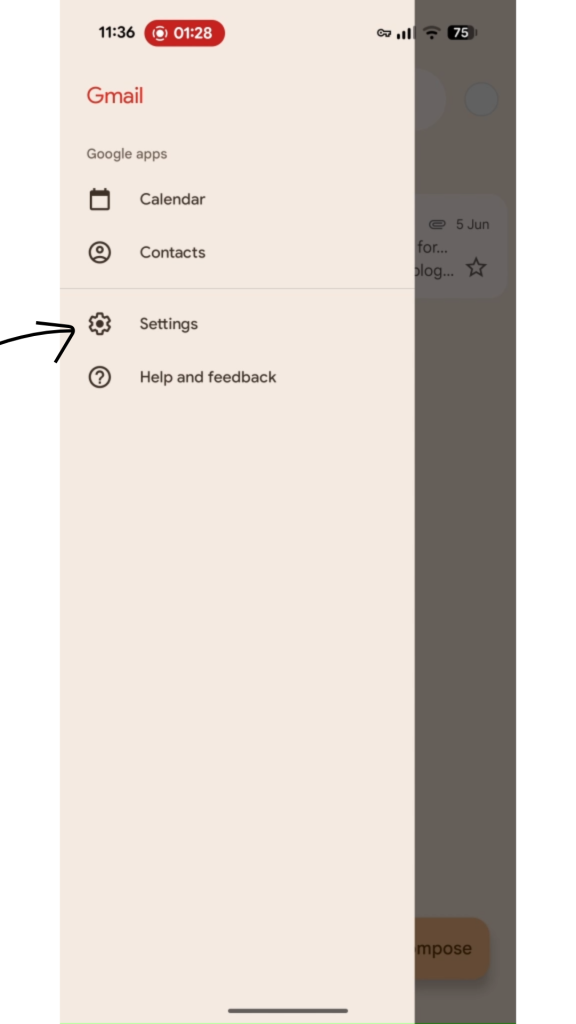
12. Choose Account
Choose the account you want to change settings for.
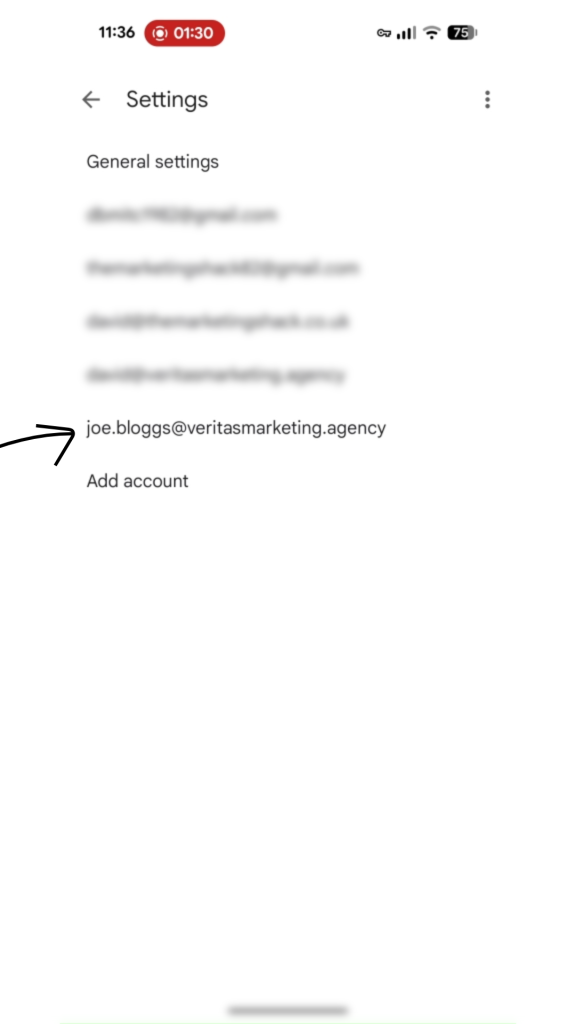
13. Find Incoming Settings
Scroll down the list and find incoming settings and Tap it.
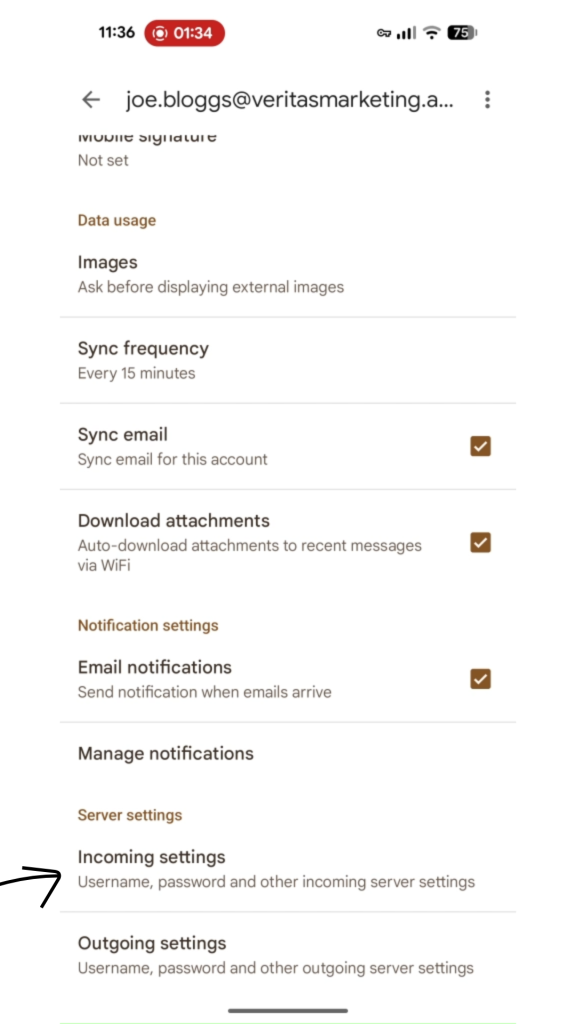
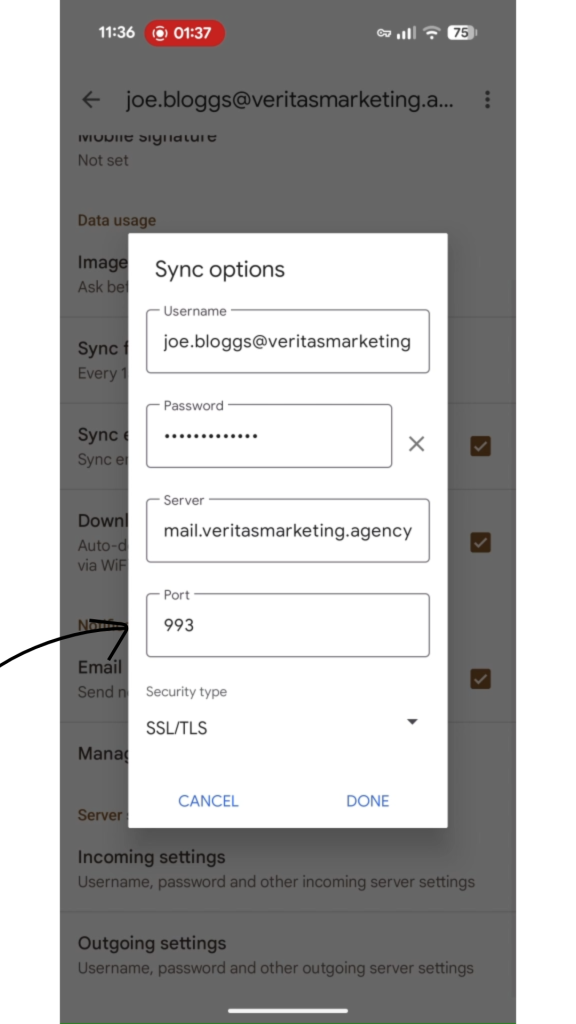
14. Check the Incoming Settings
Make sure your email, password, server and port number are all correct.
Username: Your email
Password: Your Password
Server: mail.veritasmarketing.agency
Port numbers: IMAP: 993 POP: 995
Security Type: SSL/TLS
Tap DONE after making any changes.
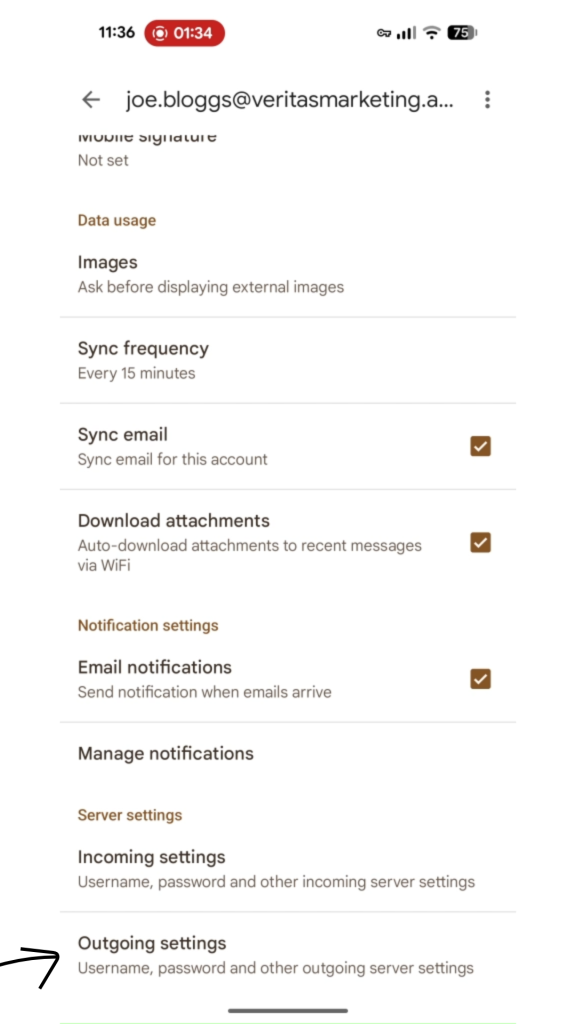
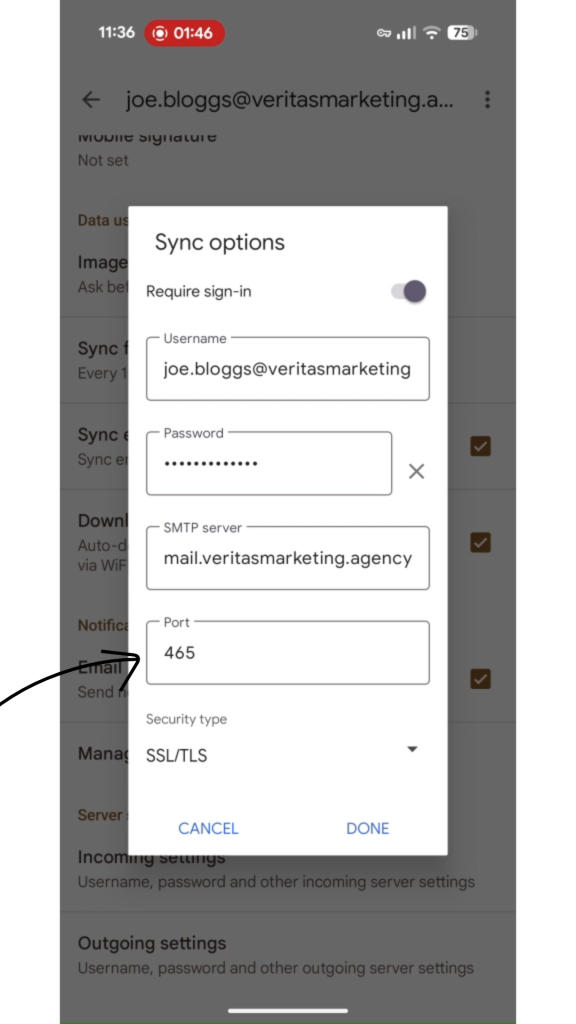
15. Find Outgoing Settings
Scroll down the list and find outgoing settings and Tap it.
16. Check the Outgoing Settings
Make sure your email, password, server and port number are all correct.
Username: Your email
Password: Your Password
Server: mail.veritasmarketing.agency
Port number: SMTP: 465
Security Type: SSL/TLS
Tap DONE after making any changes.
Android – Samsung (Generic Email App)
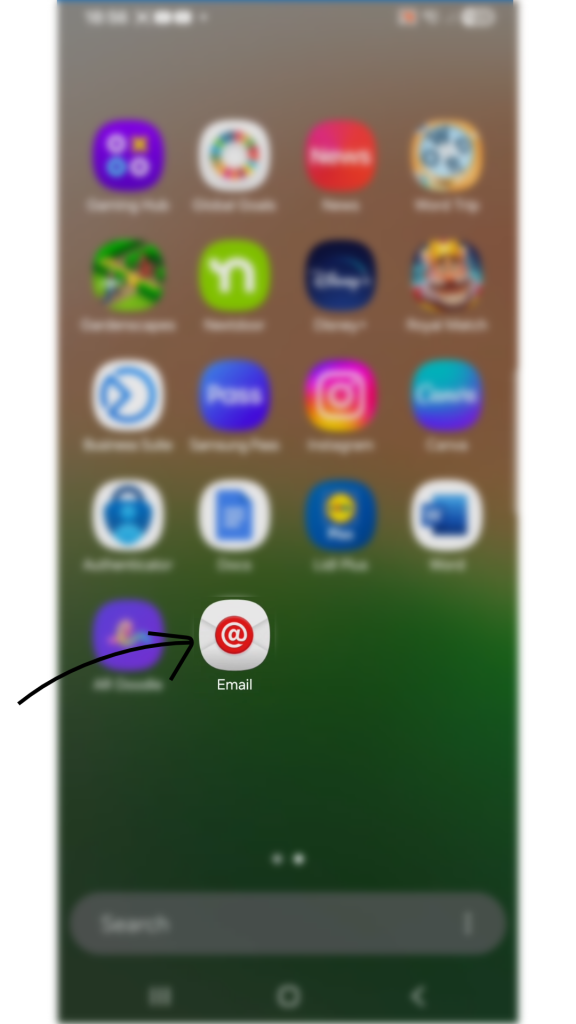
1. Open the Samsung Email App
Find the Email app (usually a red @ over a white envelope) and open it.
2. Access the Setup Screen
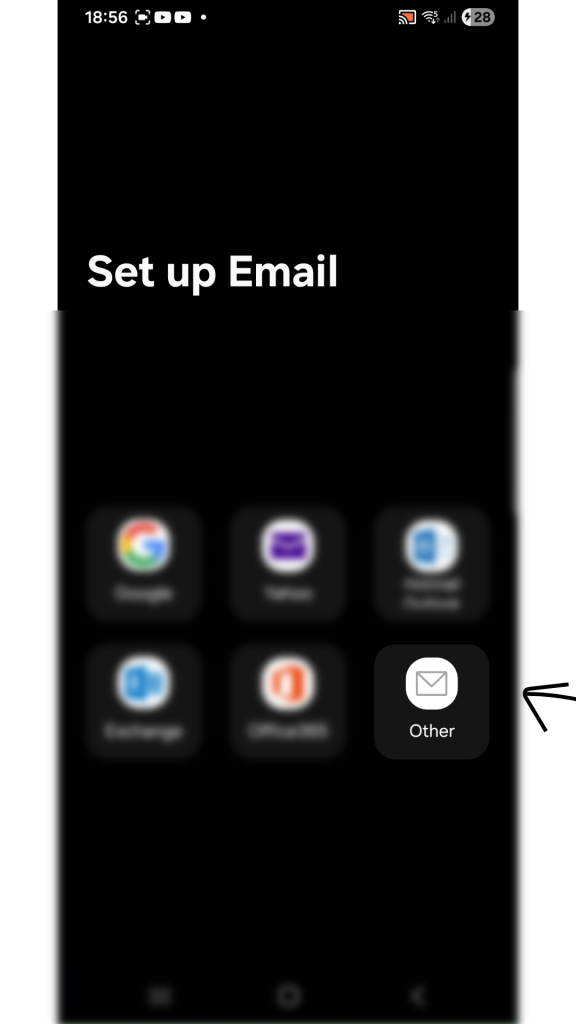
If this is your first time opening the app, you will see a “Set up Email” screen immediately. If you already use this app for another email, tap the three horizontal lines (menu) in the top left, tap the gear icon (Settings), and tap Add account.
Tap Other at the bottom of the list of email providers.
3. Enter Credentials Manually
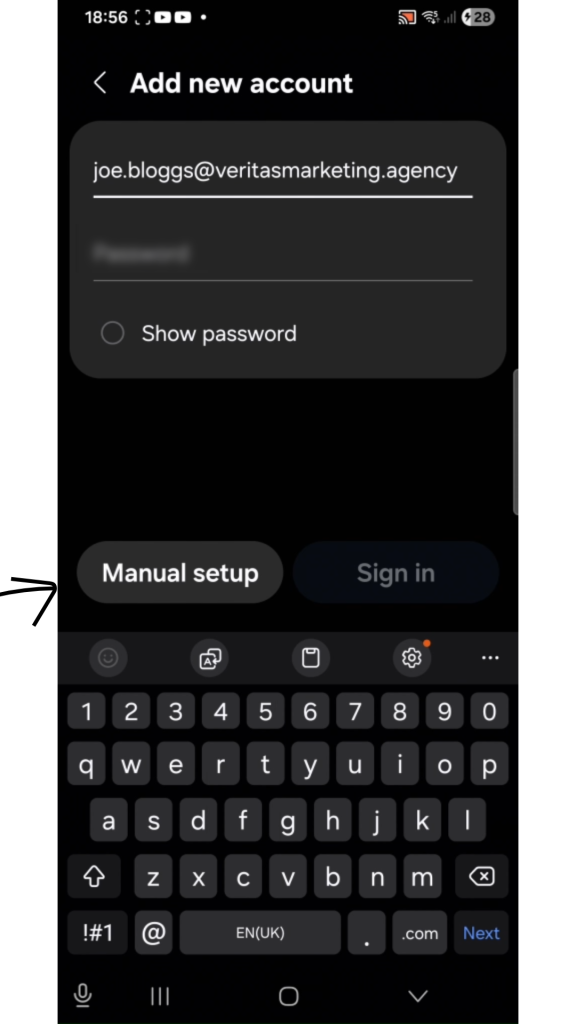
Do not tap Sign In immediately
Type your full professional email address and your email password. Tap Manual setup at the bottom left of the screen.
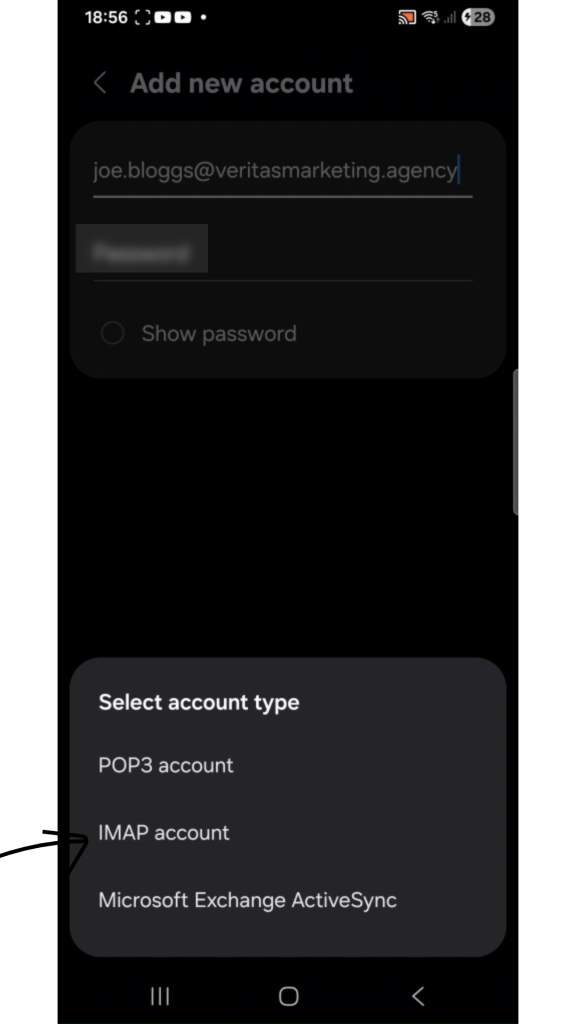
4. Choose Account Type
Tap IMAP account so your emails stay synced with your computer. (Only choose POP3 if you strictly want emails stored only on your phone).
5. Configure Incoming Server
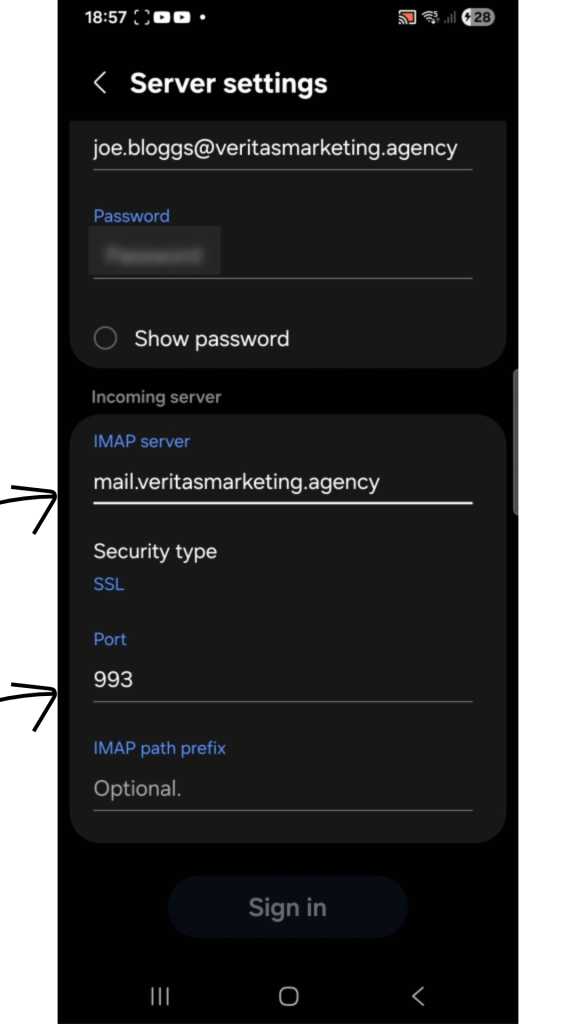
Scroll down to the Incoming server section and enter the following: IMAP server: mail.veritasmarketing.agency Security type: SSL/TLS Port: 993 (Use 995 if you chose a POP3 account). Leave IMAP path prefix empty.
6. Configure Outgoing Server
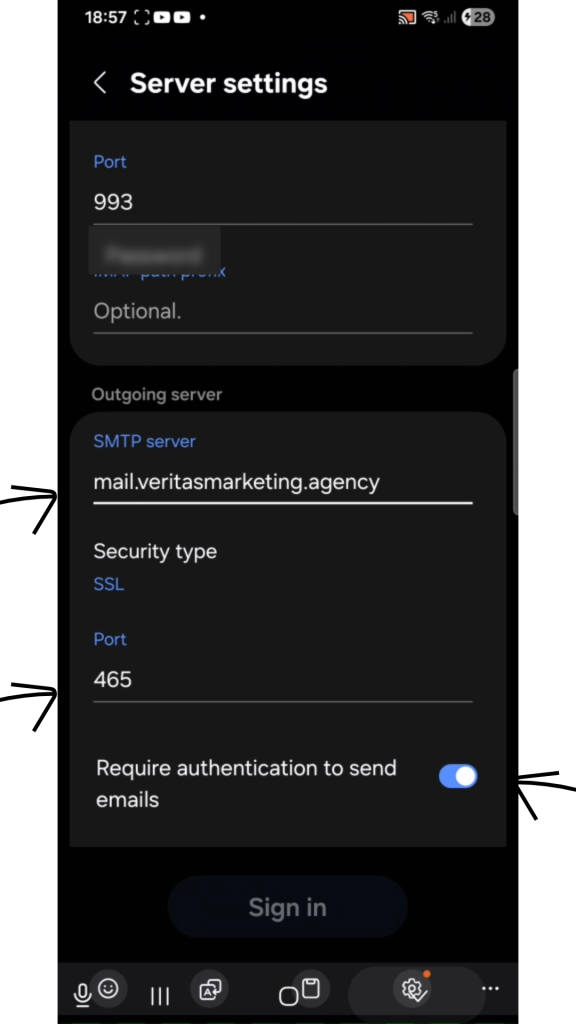
Scroll further down to the Outgoing server section and enter: SMTP server: mail.veritasmarketing.agency Security type: SSL/TLS Port: 465 Ensure the switch for Require authentication to send emails is turned ON.
7. Outgoing Server Username & Password
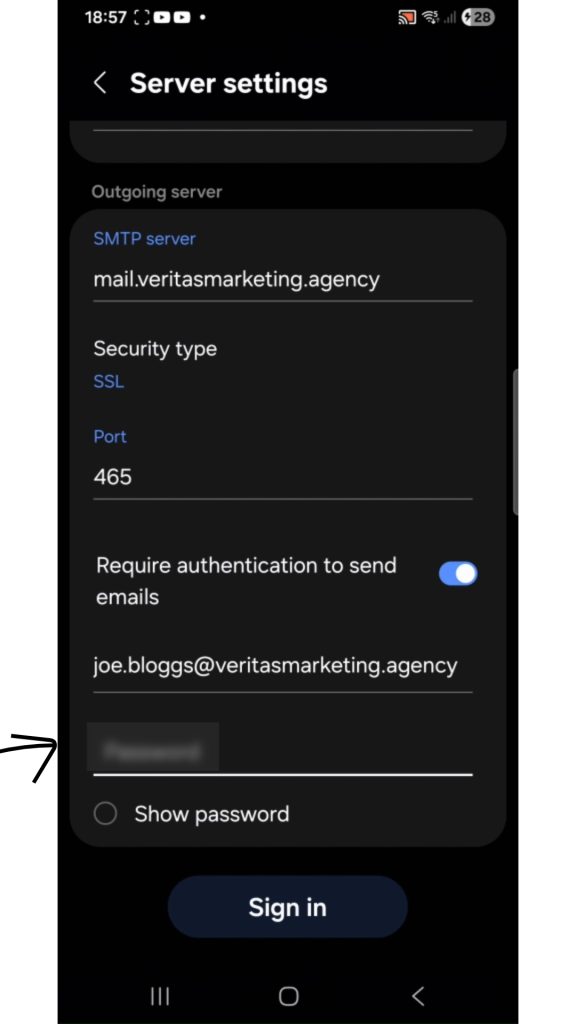
Scroll down and add your email and password again for the outgoing server authentication.
8. Sign In
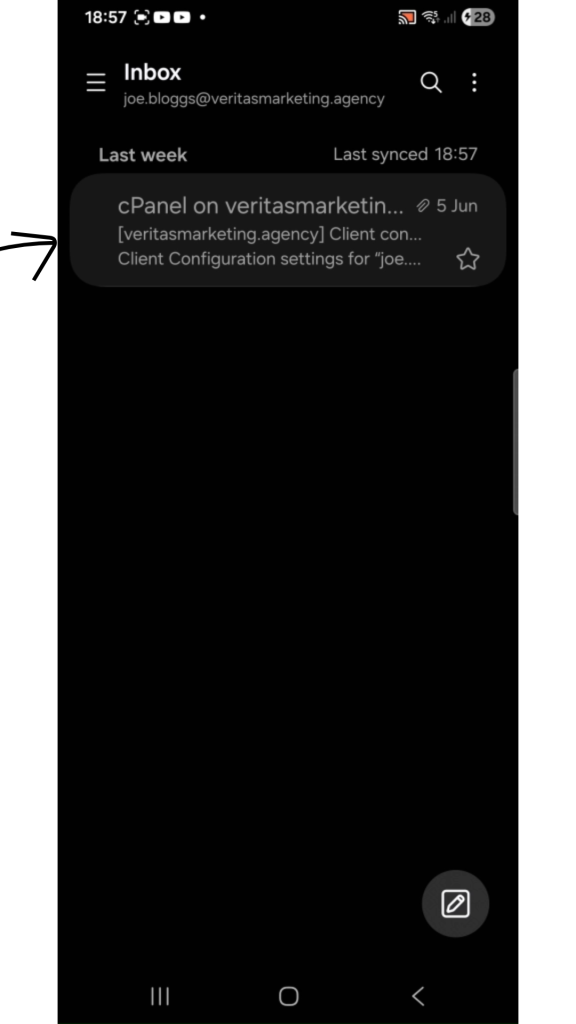
Tap Sign in or Done at the bottom. The app will verify your settings and take you straight to your inbox. If it has installed and connected correctly, you will see your emails on screen.
Microsoft Outlook App (iOS & Android)
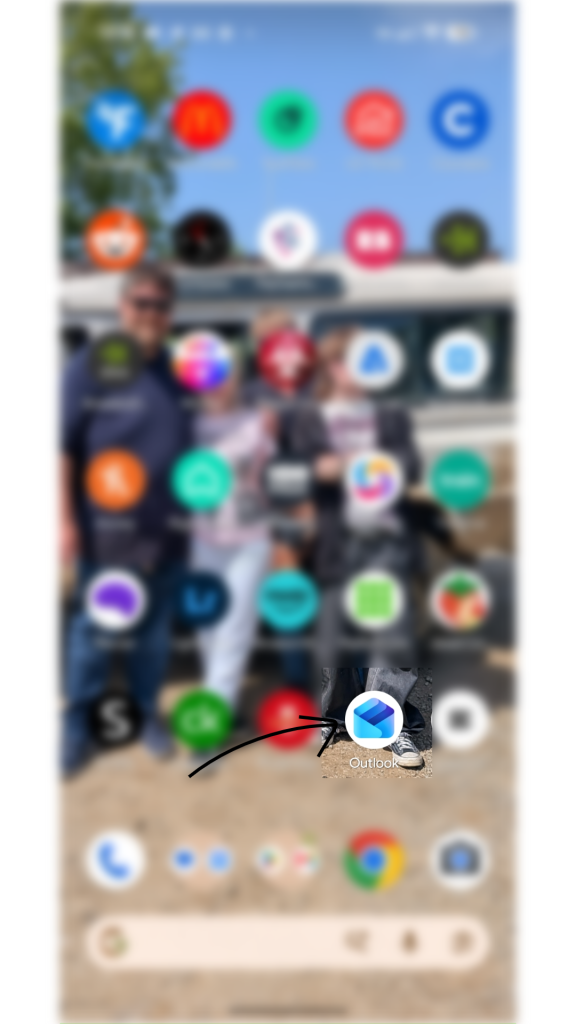
Open the Outlook App
Locate the Outlook app on your phone and open it.
Start Adding the Account
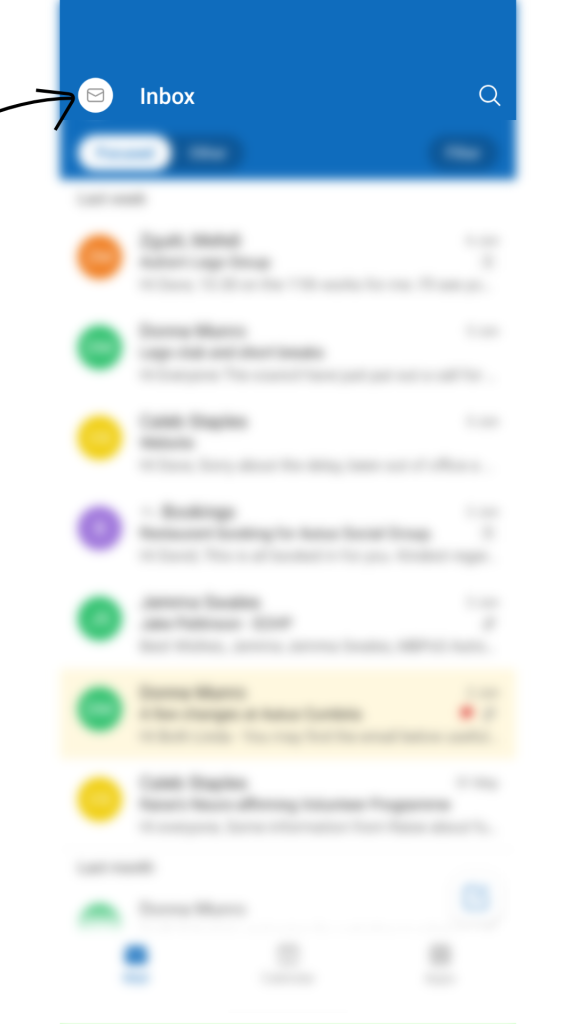
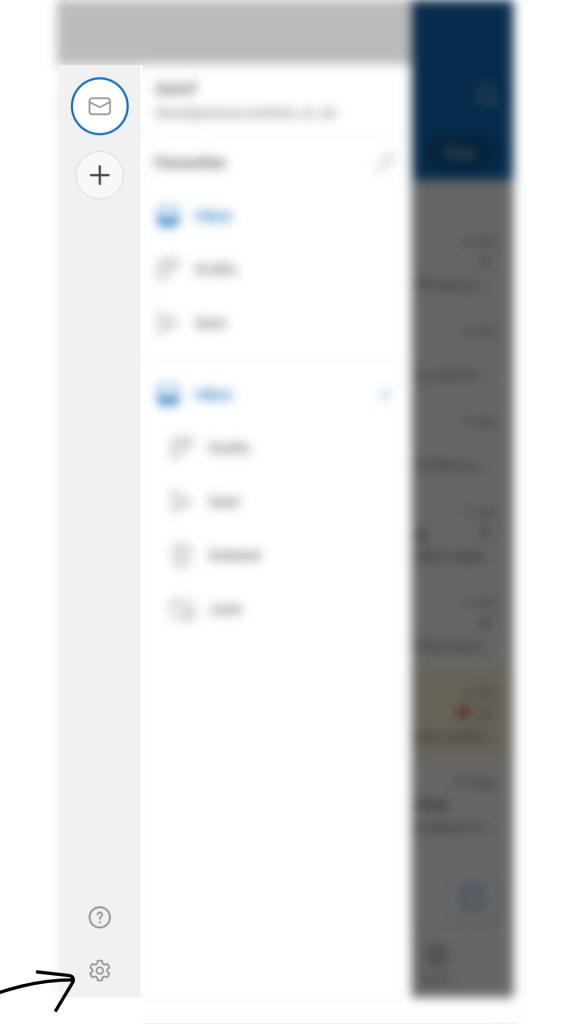
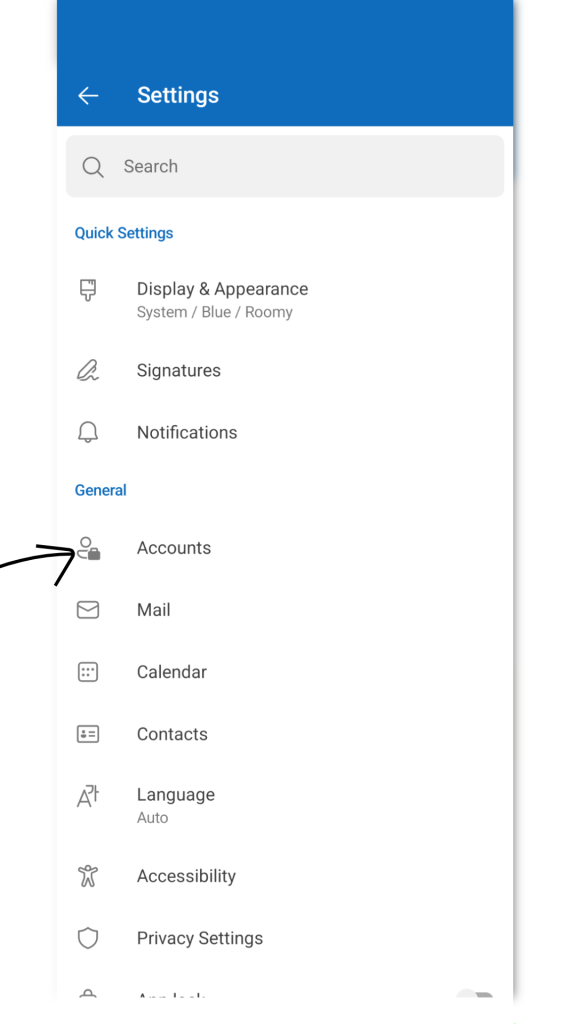
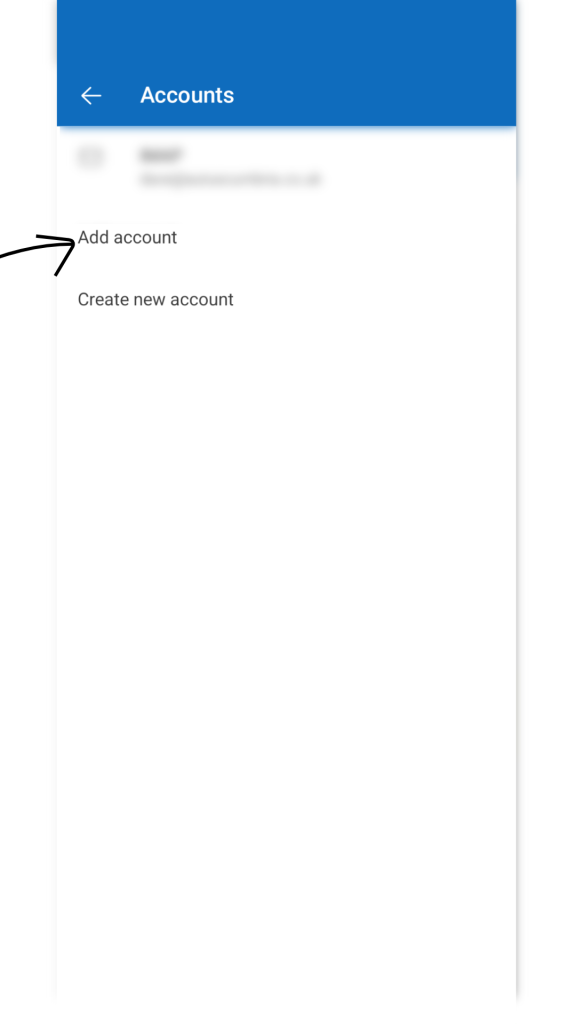
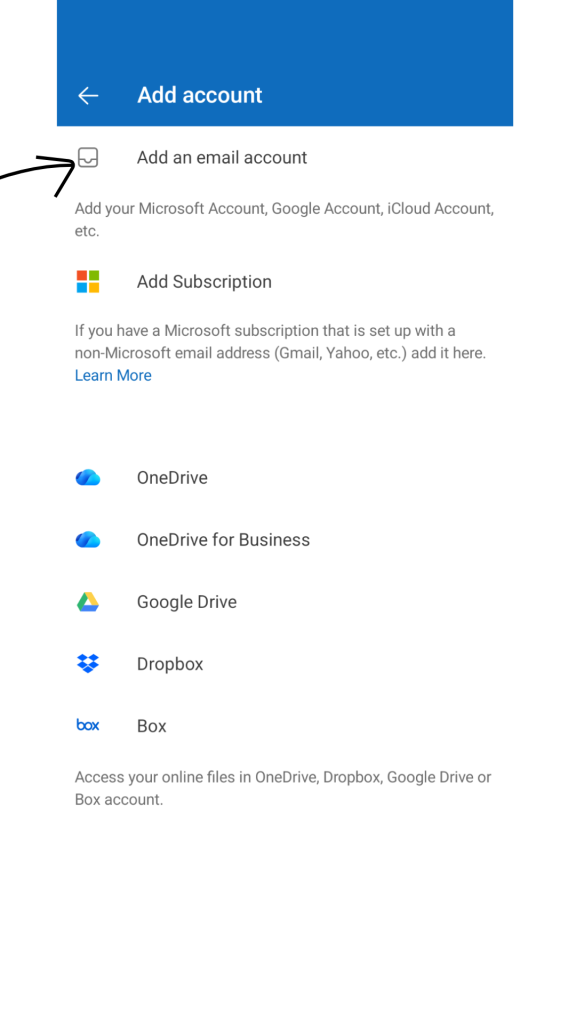
If this is your first time using the app, tap Get Started. If you are already using Outlook, tap your profile picture or envelope in the top left, tap the gear icon (settings) in the bottom left, tap Accounts, then Add account and then Add an Email Account.
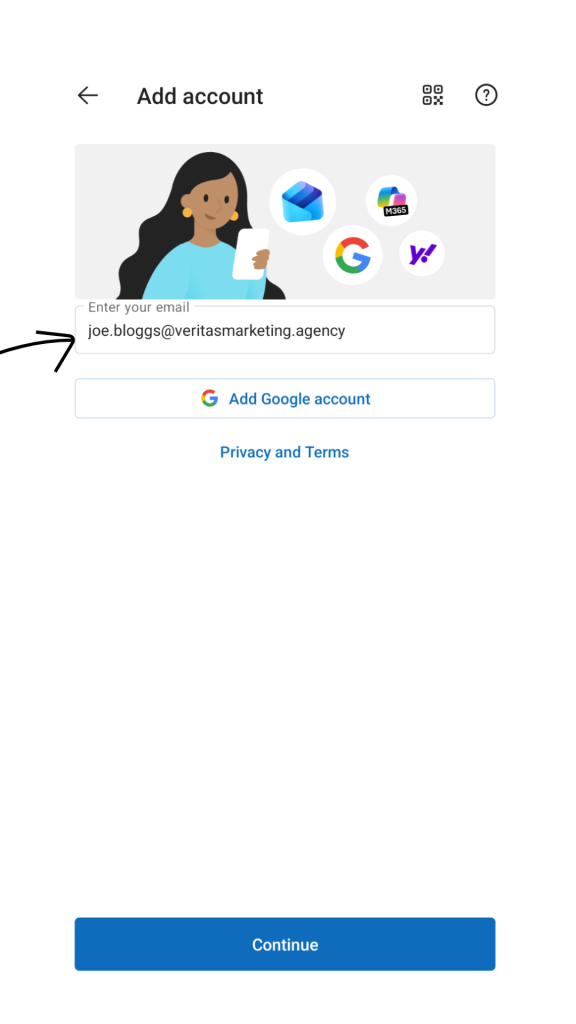
Enter Email Address
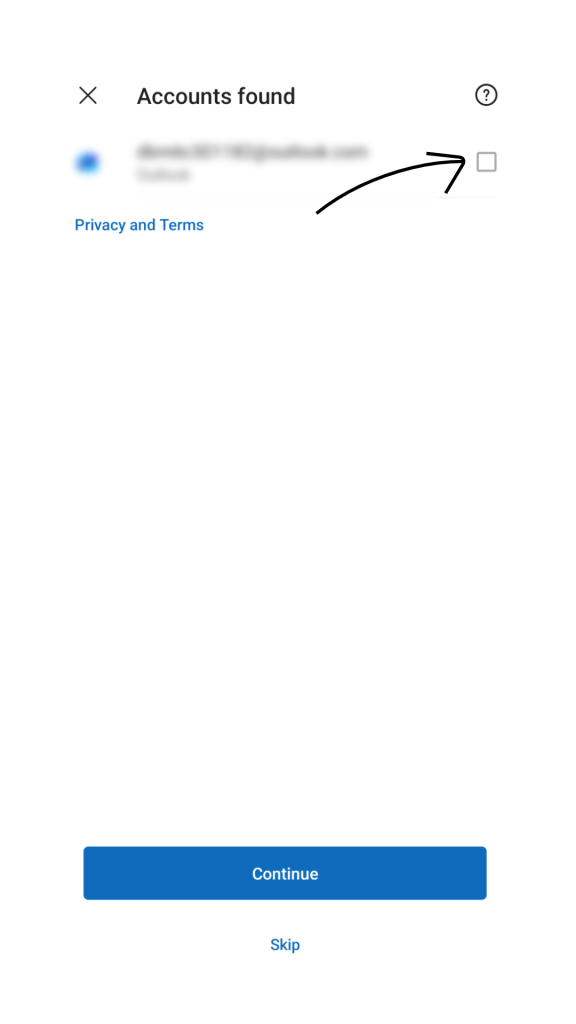
If an email is found, untick the box and click continue or skip, then type in your full professional email address (e.g., joe.bloggs@yourdomain.com) and tap Continue.
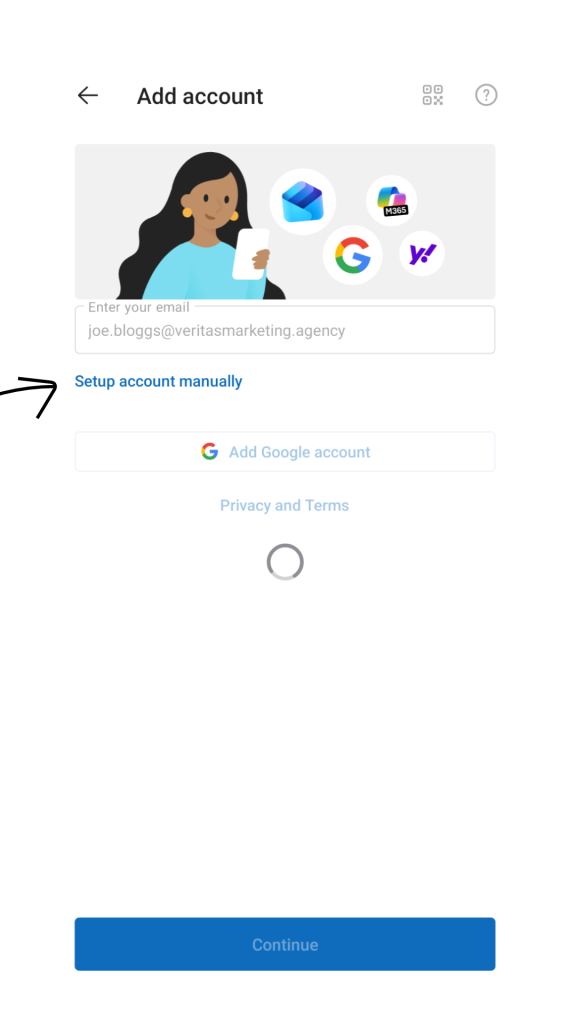
Bypass Auto-Setup
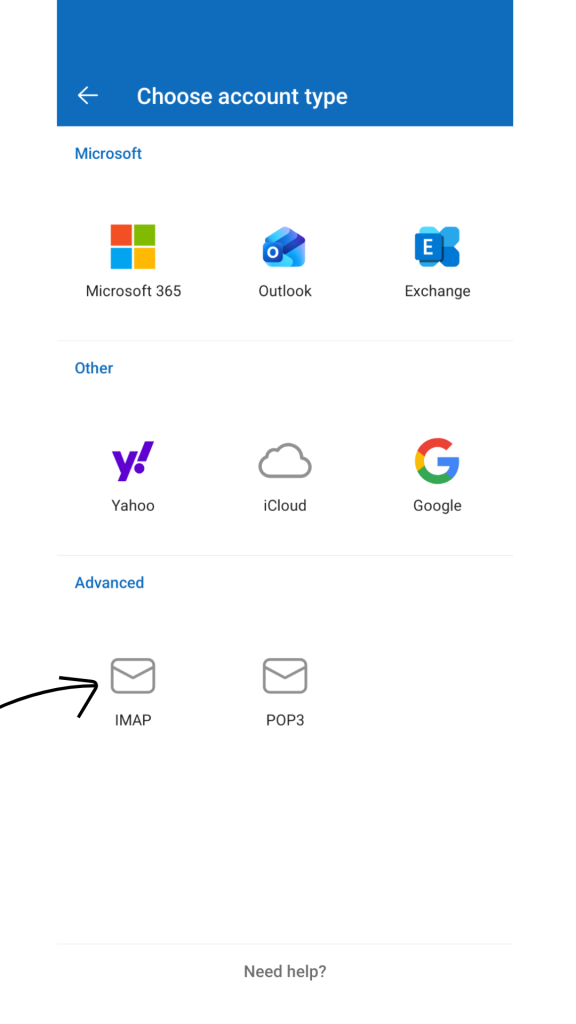
If Outlook tries to guess your email provider and gets it wrong, tap Not [Provider] or “Setup account manually” at the bottom of the screen. When the provider list appears, select IMAP (or POP3) under the “Advanced” section.
Due to security settings, screenshots are unavailable for the next sections.
Enable Advanced Settings
This is required to enter the correct server ports
On the setup screen, look for a switch that says Advanced Settings and toggle it ON so it turns blue.
Configure Incoming Server Settings
Fill out the top half of the screen exactly as follows:
IMAP Username: Your email
IMAP Password: Your Password
IMAP Host Name: mail.veritasmarketing.agency
Port numbers: IMAP: 993 POP: 995
Security Type: SSL/TLS
Configure Outgoing Server Settings
Scroll down to the SMTP section and fill it out:
SMTP Username: Your email
SMTP Password: Your Password
SMTP Host Name: mail.veritasmarketing.agency
Port numbers: SMTP: 465
Security Type: SSL/TLS
Save and Connect
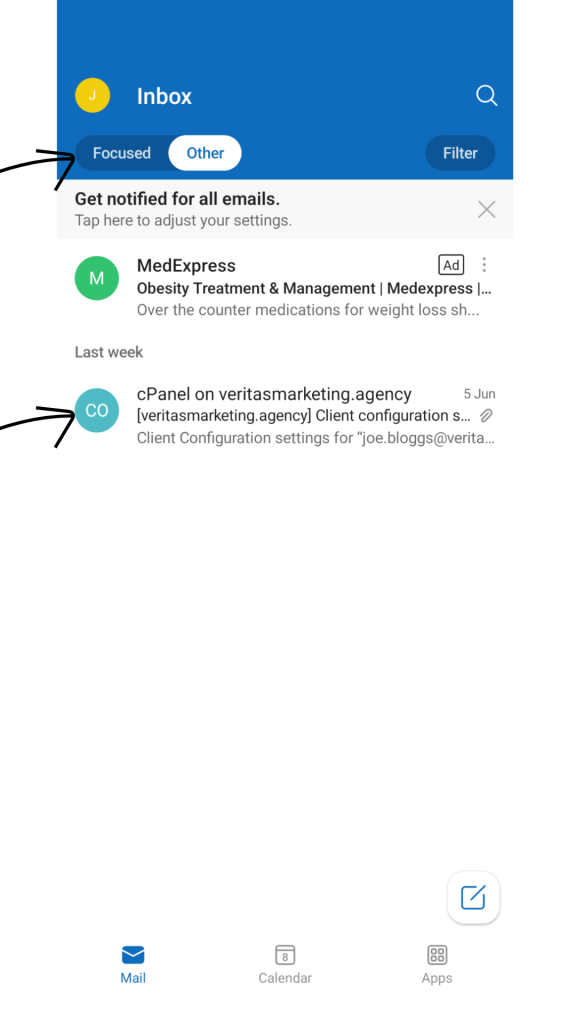
Tap the Tick icon in the top right corner (or tap Sign In at the bottom) to save your settings and load your inbox. You will see your emails if successful (you may need to switch between ‘focused’ or ‘other’ to see your emails).